Last Updated: November 5, 2026
Quick Summary
House extension design starts with a written brief setting out what you need, how you live and what you can spend, before any sketching begins. You then measure the existing house, check site constraints such as boundaries and drains, and choose the extension type and layout that fits your site and brief.
- Find the property line on the title plan, not the fence line, which is often a few hundred millimetres out.
- Rear, side, side-return and wraparound are the main extension types, in single or two storey.
- South and west glazing gains the most heat, so plan external shading at concept stage.
- Part L covers energy and Part F covers ventilation for extensions under Building Regulations.
- Send one fixed drawing package to every contractor and ask for itemised quotes, not lump sums.
Table of Contents
- Step 1: Write a Design Brief Before You Sketch Anything
- Step 2: Measure the Existing House and Check Site Constraints
- Step 3: Choose the Extension Type and House Extension Layout Ideas
- Step 4: House Extension Design Ideas That Work in Practice
- Step 5: Daylight, Overheating and Energy Performance
- Step 6: Use a House Extension Planner to Sequence Approvals and Costs
- Step 7: Turn Concepts into House Extension Plans You Can Build From
- Step 8: Commission Your Design and Groundworks Quote
- Frequently Asked Questions
Step 1: Write a Design Brief Before You Sketch Anything
A house extension design starts with a written brief, not a drawing. The brief sets out what you need from the new space, how you live now, and what you can spend. Get it down on paper before anyone picks up a pencil.
Most guides skip this step. That is why so many extensions end up as a big room nobody uses properly.
Room-by-Room Decisions to Settle First
Work through each room the extension will touch. For every one, answer three questions:
- What happens in this room, and who uses it?
- How many people need to sit, cook, work or store things there?
- What must connect to it: garden, hallway, utility, downstairs WC?
Settle these before you think about shape:
- Kitchen: do you want open-plan living, or a separate cooking zone?
- Living space: how much glazing, and which way does it face?
- Utility and storage: where do the washing machine and coats go?
- Access: can you reach the garden without walking through the new room?
- Future needs: step-free access, a downstairs bathroom, or a home office?
A common mistake is designing for how you wish you lived, not how you actually live. Be honest about clutter, pets and children.
Step 2: Measure the Existing House and Check Site Constraints
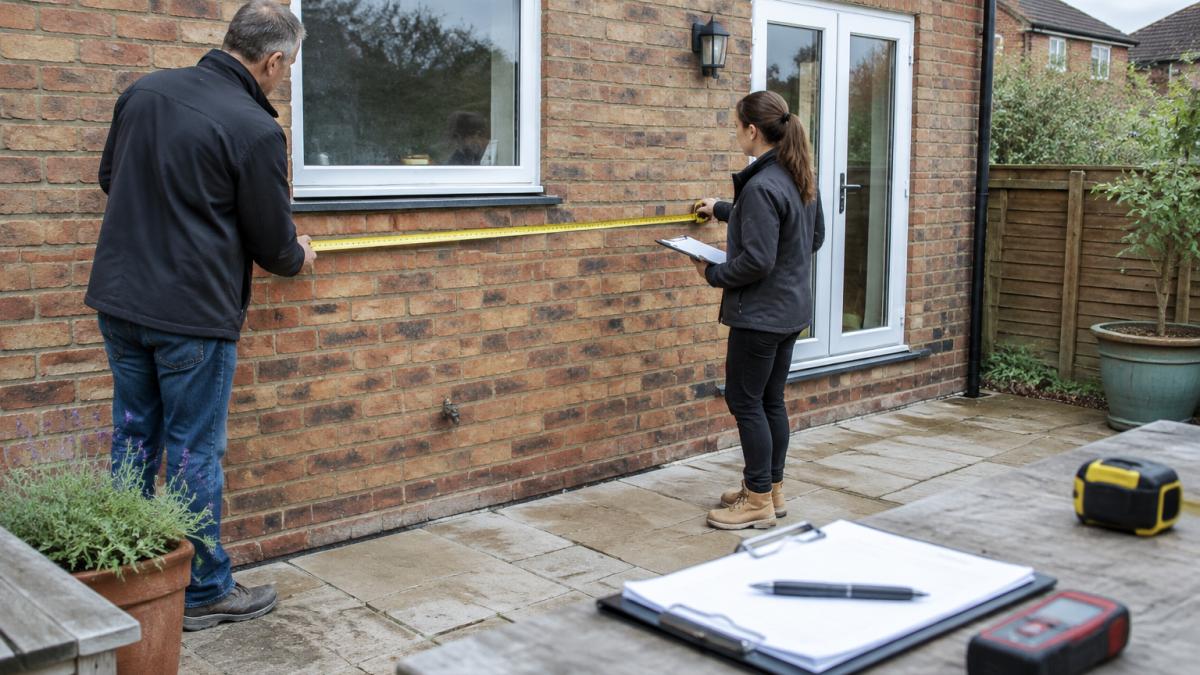
Before any sketching, measure the existing house properly and map the site. Good house extension plans stand or fall on accurate existing dimensions and an honest read of the constraints. This is the step most guides skip, and it is the one that stops you designing a room that cannot be built or a layout that fails at the first planning check.
How to Record the Existing House
Work room by room with a tape measure, a laser measure and a clipboard, and record everything on a simple sketch plan. For each room note:
- Internal clear widths and depths, corner to corner.
- Ceiling height at the highest and lowest points.
- Wall thicknesses, including any cavity.
- Window and door positions, with widths and sill heights.
- Radiator, boiler, consumer unit and stopcock locations.
Then measure the outside: the overall footprint, the rear wall length, the position of downpipes and gullies, and the height of the eaves and ridge.
Assess the Site Constraints That Decide the Design
The constraints that catch people out, and how to check each one:
- Boundaries: find the property line on the title plan, not the fence line. Fences are often a few hundred millimetres out, and building over the true boundary is a dispute waiting to happen.
- Drains: lift manhole covers and trace the runs. A shared drain or a public sewer crossing the garden can dictate where foundations go, and you may need a build-over agreement before work starts.
- Trees: note any tree within falling distance of the extension. Root protection areas affect foundation design, and some trees are protected by a Tree Preservation Order or sit in a conservation area.
- Levels and drainage falls: record ground levels at the house and at the garden boundary. A garden that slopes towards the house needs a drainage strategy, not just a new patio.
- Access: walk the route a digger, a skip and a concrete wagon would take. Narrow side access, restricted parking or a shared driveway changes the build method and the cost.
Permitted development rights, Party Wall agreements and the approval route all depend on these facts. Our house extension guide walks through the planning side in detail once you know your constraints.
Watch out: measuring from estate agent particulars or an old floor plan is a false economy. Those drawings are indicative, and a 100 mm error at the rear wall can throw out every dimension in the concept design.
Step 3: Choose the Extension Type and House Extension Layout Ideas
Extension type decides layout, cost and how much light you get. Pick the type that fits your site and brief, not the one that looks best online.
The main options:
- Rear extension: the most common choice, adding depth to the back of the house.
- Side extension: widens the property, often for a utility, study or extra bedroom.
- Side-return extension: fills the narrow strip beside a rear reception room, a classic terraced-house move.
- Wraparound extension: combines rear and side, usually for open-plan kitchen-dining space.
- Single-storey: cheaper per square metre and simpler structurally.
- Two-storey: adds floor area upstairs but needs more structural work and often planning permission.
Good house extension layout ideas share one trait: they connect badly used space to the garden and to the rest of the house.
Sketch two or three layouts. Test each against your brief. Then check which ones fall inside permitted development and which need a planning application.
Step 4: House Extension Design Ideas That Work in Practice
The best house extension design ideas solve a problem you already have. They are not style statements bolted onto the back of a house.
What works in practice:
- Match the roofline where the extension meets the existing house, so the join looks intentional.
- Use one glazing language: pick a frame style and stick to it across doors and windows.
- Keep the ceiling height consistent between old and new rooms where you can.
- Choose materials that age well in British weather, and check how they look wet.
- Plan the kitchen first if the extension is for cooking and dining. Services drive the layout.
What usually disappoints:
- Glass boxes that overheat in July and cost a fortune to heat in January.
- Very wide openings with no structural thought behind them.
- Feature walls and finishes chosen before the floor plan is settled.
Step 5: Daylight, Overheating and Energy Performance
Daylight and overheating are design decisions, not lucky outcomes. Get them right at concept stage and the extension stays comfortable all year.
Plan for:
- Rooflights over circulation and kitchen zones where wall glazing is limited.
- Glazing orientation: south and west glass gains the most heat, so shade it.
- Cross ventilation: openings on two sides move air through the room.
- External shading: brise-soleil, deep reveals or a canopy over big doors.
- Insulation and airtightness: these decide your running costs more than the boiler does.
Building Regulations set the legal minimum for energy performance, ventilation and fire safety. Our guide to Building Regulations compliance explains what each part requires.
If low running costs matter to you, look at sustainable construction methods before the design is fixed.
Step 6: Use a House Extension Planner to Sequence Approvals and Costs
A house extension planner is a simple sequence: brief, survey, concept, approvals, technical design, tender, build.
The sequence that works:
- Brief and budget set before design starts.
- Measured survey of the existing house and site.
- Concept design with two or three options.
- Planning check: permitted development or full application.
- Party Wall notices where the works affect a shared wall.
- Technical drawings for Building Regulations.
- Tender: send the same information to every builder.
- Construction with a named project manager.
Costs follow the same order. Build cost per square metre is the figure to track, and it varies with ground conditions, glazing and structural complexity.
Watch out: comparing builder quotes built on different drawings is meaningless. Fix the design first, then compare like for like.
Running the steps in this order keeps the project predictable.
| Step | What happens |
|---|---|
| 1 | Brief and budget set before design starts |
| 2 | Measured survey of the existing house and site |
| 3 | Concept design with two or three options |
| 4 | Planning check: permitted development or full application |
| 5 | Party Wall notices where works affect a shared wall |
| 6 | Technical drawings for Building Regulations |
| 7 | Tender: send the same information to every builder |
| 8 | Construction with a named project manager |
Step 7: Turn Concepts into House Extension Plans You Can Build From
Buildable house extension plans are a set, not a single drawing. Your concept becomes a package that a builder can price and a Building Control body can approve.
The set usually includes:
- Floor plans at each level, dimensioned and annotated.
- Elevation drawings showing how the extension looks from outside.
- Section drawings cutting through the junction between old and new.
- A site plan showing boundaries, drainage and access.
- Structural drawings from a structural engineer for beams, openings and foundations.
- Specification notes naming materials and finishes.
Your architect or architectural designer coordinates the set. A structural engineer signs off structural changes. A builder prices from it.
This is the stage where design mistakes get expensive. Check door swings, kitchen appliance positions, drainage falls and head heights under beams before the drawings are issued.
Step 8: Commission Your Design and Groundworks Quote
The final step is hiring, and it has two parts that are often confused: appointing a designer to produce the drawings, and appointing a contractor to build from them. Get the first right and the second becomes a fair comparison.
Compare Design Professionals Before You Compare Fees
Architects, architectural technologists and other designers all prepare extension drawings, but their scope and fees differ. When you request a fee proposal, ask each one to set out:
- Scope of work: brief development, measured survey, concept options, planning application drawings, Building Regulations drawings, and site inspection during the build.
- Deliverables: exactly which drawings and documents you receive at each stage, and in what format.
- Statutory fees: whether planning application fees, Building Control fees and structural engineer costs are included or separate.
- Stages and payments: how the fee is split across work stages, and what happens if the project pauses.
- Insurance and registration: professional indemnity cover and, for architects, registration with the relevant professional body.
A low fee that covers concept drawings only is not comparable with a fee that carries the project through to construction-ready information. Ask each professional to price the same scope so you compare like with like.
Send One Drawing Package to Every Contractor
Once the design is fixed, send the full drawing package to contractors and ask for itemised quotes, not lump sums.
What a good quote shows:
- Groundworks and foundations, priced separately
- Structural steel and beams
- Drainage and services connections
- Insulation, glazing and external finishes
- Preliminaries, waste removal and programme
Ask each contractor the same questions: who manages the site day to day, what insurance they carry, and how variations are priced. Vague answers now become cost additions later.
At Thane, our residential construction service covers groundworks, structural engineering and the build under one project manager. You can contact our team for a free quote and a clear, itemised breakdown.
Frequently Asked Questions
Do I need an architect to design a house extension?
Not always. A competent architectural designer can prepare house extension plans for many domestic projects, and some homeowners handle the brief and layout themselves before handing over to a technician. An architect is worth the fee where the site is awkward, the property is listed or in a conservation area, or the design ambition is high. Whoever draws the plans, structural changes need a structural engineer, and the drawings must satisfy building regulations before construction starts.
How do I choose the right layout for a house extension?
Start from how you actually live rather than from photographs. List the rooms you use daily, the sightlines you want from the kitchen or living area, and where garden access matters most. Rear and side-return layouts suit open-plan living and kitchen-dining spaces; wraparound layouts work where you want to capture light on two sides. Test each option against circulation, furniture placement and the position of existing windows, then check the chosen layout against permitted development limits.
Do I need planning permission for a house extension?
Many single-storey rear extensions fall under permitted development, but the limits are specific and vary by property type, and they are removed entirely for flats, listed buildings and homes in conservation areas. Larger schemes need a householder planning application. Always confirm the position for your address before committing to a design, because a scheme that exceeds the limits will need consent and a longer programme.
How much does it cost to design a house extension?
Design fees depend on the size and complexity of the scheme, the level of service and whether planning and building regulations work is included, so get written fee proposals from two or three designers and compare what each one actually covers. Build costs are separate and are usually quoted per square metre. Thane publishes its pricing on its website and provides detailed quotes with no hidden costs, so ask for a fixed figure before work begins.
Designing an extension is a sequence, and skipping steps costs money. Get the brief, survey and drawings right, and the build becomes straightforward. Thane has delivered extensions and groundworks since 2014, with CSCS-certified crews, full public liability and employer's insurance, and one named project manager from first quote to completion. Get started with Thane and build an extension that works as well as it looks.
