Quick Summary
Learning how to connect a new extension to an old house starts with a survey of the existing walls, foundations and roof at the junction. Your structural engineer then specifies the wall ties, footings and flashing, and the work is built in sequence with temporary support where needed.
- Ask a surveyor or structural engineer to inspect the junction before any design is fixed.
- Older foundations are often shallower than modern standards, so compare them with the new footing.
- Your engineer sets the tie type, spacing and embedment depth, not the builder on the day.
- Never cut into the existing wall without temporary support designed by your engineer.
- Line up the damp-proof course across the join and keep insulation continuous at the junction.
Table of Contents
- Checking the Existing House Before You Start
- How to Tie an Extension into an Existing Wall
- Extension Roof Connection to Existing House
- Preventing Damp Between House and Extension
- When You Need a Structural Engineer for House Extension Work
- Booking Your Extension Connection With Thane
- Frequently Asked Questions
Checking the Existing House Before You Start
Learning how to connect a new extension to an old house starts long before the first brick is laid. Older properties often hide surprises behind plaster and under floors, and finding them early can save money and delay. A careful survey gives you a clear picture of what the new build must work with.
Start by asking a surveyor or structural engineer to inspect the existing walls, foundations and roof where the join will happen. Many homeowners find that the junction is the most complicated part of the whole project. Plan for it from day one.
Older-house risks to survey first
Older homes rarely match their drawings, if drawings exist at all. Check for these common risks before you commit to a design:
- Uneven or shallow foundations. Older footings may be shallower than modern standards, so they can move differently from new footings.
- Hidden movement or cracks. Existing cracks above doors and windows can signal settlement. Mark and monitor them before work starts.
- Lead pipes, old wiring and gas runs. These often sit inside the wall you plan to open.
- Damp and rot. Timber wall plates and floor joists near the join are common trouble spots.
- Unknown materials. Older walls may contain lime mortar, which needs different treatment from modern cement-based products.
Ask your surveyor to record each risk in writing. A clear record protects you if problems appear mid-build.
Floor levels and thresholds
Older houses often have floors that sit at different heights from room to room. Your new extension floor must match the existing floor level, or you may end up with a step that trips people up and collects water.
Measure the existing floor level at the planned doorway. Then decide how the new floor will meet it. Many projects use a level threshold, which helps with wheelchairs, pushchairs and walking aids. Set the floor level early, because changing it later usually means rework.
How to Tie an Extension into an Existing Wall
Tying in means physically fixing the new structure to the old so the two behave as one building. Done correctly, it keeps the extension stable, controls differential movement and stops the walls pulling apart over time. Done badly, it is the source of cracks, leaks and expensive remedial work.
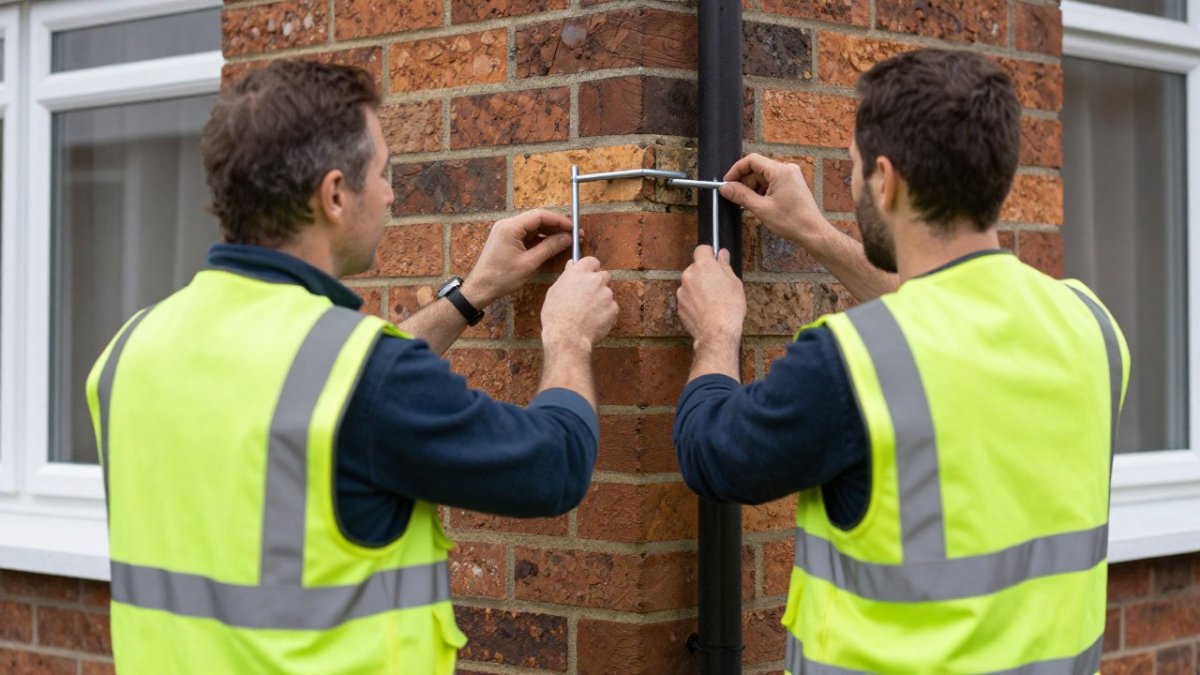
!Two builders in hi-vis vests inspecting stainless steel wall ties being fixed into the brickwork at the junction of an older brick house and a new extension wall
The most common method uses stainless steel wall ties. Drill into the existing wall, fix the ties into sound brickwork, and build the new wall so it bonds to them.
Check the foundations before you fix the ties
A tie transfers load and restrains movement, so it only works if both sides are stable. Older footings are often shallower and narrower than modern strip foundations, and they may bear on made ground or old drains. Ask your engineer to compare the existing foundation depth and width with the proposed new footing.
A common pattern is for the new extension to be founded on a deeper, stiffer footing than the house. That difference is fine provided the junction is detailed to accommodate it, usually with a movement joint or a slip plane rather than a rigid bond. Confirm with your engineer whether the junction should be tied rigidly or allowed to move.
Sequence the tie-in properly
- Expose the existing wall at the junction and check its condition, remove loose render, plaster and mortar back to sound brick or stone.
- Confirm the existing foundation is adequate, or that temporary support is in place, before any digging near the old wall.
- Drill and fix the ties at the spacing and embedment your engineer specifies, using the specified resin or mechanical fixing.
- Build the new wall in step with the old so the bond forms correctly and the courses line up.
- Check that the joint is straight and plumb before the mortar sets, and photograph each lift for the building-control inspector.
Watch out: Never cut out or tooth into a section of the existing wall without temporary support designed by your engineer. A wall that loses its restraint can move or collapse, and the cost of a collapse is far greater than the cost of the temporary works.
What building control will want to see
Your building-control inspector will normally want to see the junction before it is covered up: the exposed existing wall, the tie type and spacing, the damp-proof course and the foundation detail. Agree inspection stages with your builder at the start, and keep the engineer's drawings on site. If the existing wall turns out to be hollow, friable or built in lime mortar, the engineer may change the tie specification, resolve that before the new wall rises, not after.
The table below sums up the key steps for tying the new extension into the existing wall, in the order the article describes them.
| Step | What to do | Note |
|---|---|---|
| 1 | Expose the existing wall and remove loose render, plaster and mortar | Back to sound brick or stone |
| 2 | Confirm the existing foundation is adequate or temporarily supported | Before any digging near the old wall |
| 3 | Drill and fix the ties as the engineer specifies | Spacing and embedment set by engineer |
| 4 | Build the new wall in step with the old | Bond must form correctly |
| 5 | Check the joint is straight and plumb before mortar sets | Photograph each lift for inspector |
Extension Roof Connection to Existing House
The roof is where old and new most often meet, and it is where leaks start. Knowing how to connect a new extension to an old house at roof level means careful detailing, so water runs off instead of finding a way in.
There are two common approaches. A lean-to roof connects to the existing wall below the eaves of the main roof. A pitched roof may run into the existing roof slope, which needs the new rafters to be fixed securely into the old structure.
Work out the flashing details before the roof goes on. Lead or code-compliant lead-alternative flashing is usually fixed into a chase cut into the old brickwork. Confirm the detail with your roofer, and check that it suits the existing roof covering.
Preventing Damp Between House and Extension
Damp at the junction is rarely caused by the materials alone. It usually comes from poor detailing where the new construction meets the old: a broken damp-proof course, a cold bridge that collects condensation, or a seal that cannot accommodate movement. Getting the junction right means dealing with water, heat and air together.
Line up the damp-proof course
Install a damp-proof course at the correct height in both walls and line it up across the join. Where the new floor is lower than the old, the damp-proof course in the new wall must still connect to the old one, otherwise rising moisture can bypass it. Keep external ground levels at least two courses below the damp-proof course, and check that any new paving, decking or raised beds do not bridge it.
Keep the insulation continuous
A gap in insulation at the junction creates a thermal bridge, a cold strip where warm internal air condenses. Carry the new wall's insulation through to the existing wall, and insulate the reveal of any opening. Where the existing wall is solid brick, adding internal insulation to the old wall can help, but only if the dew point is kept out of the structure. Ask your designer to show the insulation line on a junction detail, and check it on site before the walls are closed up.
Control moisture and ventilation
Older walls need to release moisture, so use breathable materials, lime mortar, breathable insulation and vapour-permeable membranes, where the old wall is exposed. Do not seal a breathable wall with cement render or a non-breathable membrane, or trapped moisture will find another way out. At the junction, use a flexible, compatible mastic or a proprietary movement joint where movement is expected, and keep weep holes and air bricks clear.
Ventilation matters too. If the extension tightens up an old, draughty house, moisture that used to escape through draughts can condense on cold surfaces. Whole-house ventilation or background ventilators may be needed, and your building-control inspector will expect the ventilation strategy to be shown on the drawings.
Weather-seal the outside
On the external face, the junction needs a continuous weather seal: a flexible sealant in the movement joint, correctly lapped breather membrane, and flashing above. Check that the sealant is compatible with the existing masonry and that it is applied to a clean, dry surface. A common failure is a rigid mortar fillet where a flexible joint is needed, it cracks as the two structures move differently.
Watch out: Do not assume the existing damp-proof course is intact or at the right height. Older houses sometimes have none, or it has been bridged by later render or paving. Investigate before the design is fixed, because retrofitting a damp-proof course is far more disruptive than detailing it in from the start.
When You Need a Structural Engineer for House Extension Work
A structural engineer is not optional for most extensions that tie into an older house. To see how a ground investigation before a house extension informs the foundations that tie the new build to the old, read our guide.
Bring in an engineer early. You can find one offering structural alterations and temporary works across London. Their drawings also support your building regulations application and any Party Wall agreement with neighbours. Ask how the engineer will inspect the work during construction.
For ground-related questions, a ground investigation guide can help you understand what your foundations need. Your engineer can then tailor the design to the soil on your site.
Booking Your Extension Connection With Thane
Once your survey, design and engineering are complete, you can book the build. Thane offers residential extension services across London and the Home Counties.
Thane is established with a decade of experience, and its professionals hold CSCS certification. For current prices, visit the Thane pricing page or request a quote.
To get started, request a residential extension quote or contact Thane for a free quote. Share your survey findings and drawings so the team can plan the connection properly.
Frequently Asked Questions
How do you structurally connect a new extension to an old house?
The new extension is normally tied to the existing wall using stainless steel wall ties fixed into the bed joints of both structures, with the old wall cut back or toothed so the two leaves bond. Floor and roof structures are then fixed to the existing house with proper bearings, not simply pushed against the old brickwork. Because the existing wall may have different foundations, movement and age, a structural engineer should confirm the connection details.
Do you need to tie a new extension into the existing house?
In most cases yes. Tying the extension in with wall ties and proper structural connections stops the two parts moving apart and keeps the join stable over time. Leaving the extension unconnected can lead to cracking at the junction, water getting in and uneven settlement. The exact method depends on the wall construction and the loads involved, so check the approach with a structural engineer and your building-control inspector before work starts.
How do you prevent damp where an extension meets an old house?
Damp at the junction is usually stopped by a continuous damp-proof course and a cavity tray or flashing that directs water outwards, combined with a properly sealed movement joint where the two structures can settle differently. Ground levels should fall away from the join, and the external finish should not trap moisture against the old wall. Older houses often lack a damp-proof course, so check the existing wall before connecting.
What should a structural engineer check before an extension is connected?
A structural engineer will typically check the condition and construction of the existing wall, the foundations of both the house and the extension, the proposed beam and lintel openings, and how the roof load will transfer into the old structure. They will also look for signs of existing movement, cracking or deterioration. Their calculations and details support building regulations approval.
